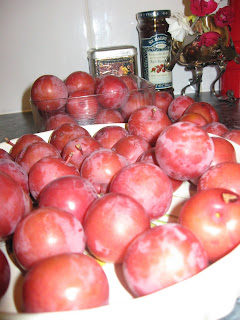
Our felicity was compounded when we realised that not only did the fruit look great, it tasted delicious. I cannot now remember how many days I came home from work only to stop before I got in the door and gorge on sun warmed plums, straight from the tree to my mouth. And much like this farmer I was loving the fact that it was free. Bliss.

It all got a bit too much, and realising that I and my housemates couldn't possibly eat the nearly seven kilos I picked from one tree in one day in a bout of plum madness (and also realising that my friends had started to look slightly terrified when I kept trying to offload plums), I stored them in the freezer and made plans for jam. Enter jam queen, fellow Morrissey lover, and ridiculously talented illustrator, Alice.
What You Will Need
(This is the only recipe I've made that requires more apparatus than ingredients.)
- Knife
- Large plastic or ceramic bowl
- Large saucepan
- Glass jars
- Ladle
- Sugar
- Plums
What You Will Need to Do:
Day One, or, The Four C's of Jamming
- Check your fruit for gross bits (cut off if needed), and then wash and weigh them. Alice suggested that for every kilo of plums, you need roughly 3 cups of sugar. We ended up with about three kilos, and about seven cups, allowing for the fact that stoning the plums would reduce the weigh somewhat. Chop your plums up, leave the skin on, remove the stones. We hypothesised that it doesn't really matter if a couple of the stones get in – after all, that's where the pectin lives – as long as you get them out again before jarring your jam.
- Chuck all your plum bits into a non-metallic bowl and mix in with sugar. It should be wet and oozy when combined.
Day Two, or, I Couldn't Figure Out Alliteration For This One, Sorry
- Remove bowl from fridge, and poke fruity goo with a wooden spoon. Marvel that the nascent jam looks so much like alien slime and realise that even if this jam caper goes horribly wrong, you could probably make a living selling this stuff to SFX companies.
- Put goo in a large saucepan over a medium heat
- Put a clean ceramic plate in the fridge. This will come in handy later.
- Stir, adjust temperature, stir some more. This will likely go on for about an hour: your jam (for this is what it is at this point) will have reduced by about a third. Be careful you don't get scalded at this point. Boiling jam is the hottest substance known to man!

Tastier and Hotter than Lava
- This is where the cold plate comes in handy (you were wondering, right?). Put a blob of jam on the plate: place the plate in the fridge. After five or so minutes remove from the fridge, and eat. If this is the consistency you would like your jam, you're done. You don't want to cook it to long – you won't be able to get it out of the jar and that would be tragic.
Part Three: Cooking Your Jars.
- Meanwhile, I hope you've been collecting glass jars. Preheat your oven to around 150 degrees.
- Soak jars and lids in very, very hot water, and scrub labels off. Clean the lids thoroughly and set aside to dry – they won't be going in the oven.
- Place jars on a tray and in a preheated oven. Turn oven off. The heat from the oven will sterilize the jars in about ten minutes.
- Ladle your jam into hot, clean jars. You will probably want gloves, tongs and friends around to help with this bit, it gets a bit awkward.
- Screw lids on tightly: press the buttons on the lids down. Now, I don't know if this is true, but Dr Dean says it is. There is always a risk that jam will go bad if the jars aren't properly sterilized – set jam aside for a few days, and if your lids don't pop up you're ready to go!
- Make some scones and eat a whole jar of jam with a friend of yours. You will feel a little bit sick, but it will be delicious.
 Fruit Goes In, Jam Comes Out
Jogging Gorgeous Summer by Islands
A Sweet Summer's Night on Hammer Hill by Jens Lekman
The New Cobweb Summer by Lambchop
*Alice not only helped with the jam, but provided the title to this blog.


